Import cv2 from PIL import Image, ImageDraw # Load a blank image to create the b
![import cv2 from PIL import Image, ImageDraw # Load a blank image to create the basis of the Ferrari image ferrari_img = Image.new('RGB', (800, 400), (255, 255, 255)) draw = ImageDraw.Draw(ferrari_img) # Draw the body of Ferrari (red rectangle) body_color = (255, 0, 0) body_position = (100, 100, 700, 300) draw.rectangle(body_position, fill=body_color, outline=body_color) # Draw Ferrari wheels (black circles) wheel_color = (0, 0, 0) wheel_radius = 50 wheel_1_position = (150, 250) wheel_2_position = (650, 250) wheel_3_position = (150, 350) wheel_4_position = (650, 350) draw.ellipse((wheel_1_position[0]-wheel_radius, wheel_1_position[1]-wheel_radius, wheel_1_position[0]+wheel_radius, wheel_1_position[1]+wheel_radius), fill=wheel_color, outline=wheel_color) draw.ellipse((wheel_2_position[0]-wheel_radius, wheel_2_position[1]-wheel_radius, wheel_2_position[0]+wheel_radius, wheel_2_position[1]+wheel_radius), fill=wheel_color, outline=wheel_color) draw.ellipse((wheel_3_position[0]-wheel_radius, wheel_3_position[1]-wheel_radius, wheel_3_position[0]+wheel_radius, wheel_3_position[1]+wheel_radius), fill=wheel_color, outline=wheel_color) draw.ellipse((wheel_4_position[0]-wheel_radius, wheel_4_position[1]-wheel_radius, wheel_4_position[0]+wheel_radius, wheel_4_position[1]+wheel_radius), fill=wheel_color, outline=wheel_color) # Save the generated image ferrari_img.save('ferrari.png') # Display the image generated using OpenCV image = cv2.imread('ferrari.png') cv2.imshow('Ferrari', image) cv2.waitKey(0) cv2.destroyAllWindows()
add the positions to draw the wheels 3 and 4, so that the image of Ferrari has four wheels. The generated image will be saved as "ferrari.png" and displayed using OpenCV.
Hope this solves the problem!
import cv2 from PIL import Image, ImageDraw # Load a blank image to create the basis of the Ferrari image ferrari_img = Image.new('RGB', (800, 400), (255, 255, 255)) draw = ImageDraw.Draw(ferrari_img) # Draw](https://image.cdn2.seaart.me/2023-07-02/40733165658181/9d40c86fa5fdd30b08f576602474f7a6381be3cc_high.webp)


import cv2 from PIL import Image, ImageDraw # Load a blank image to create the basis of the Ferrari image ferrari_img = Image.new('RGB', (800, 400), (255, 255, 255)) draw = ImageDraw.Draw(ferrari_img) # Draw the body of Ferrari (red rectangle) body_color = (255, 0, 0) body_position = (100, 100, 700, 300) draw.rectangle(body_position, fill=body_color, outline=body_color) # Draw Ferrari wheels (black circles) wheel_color = (0, 0, 0) wheel_radius = 50 wheel_1_position = (150, 250) wheel_2_position = (650, 250) wheel_3_position = (150, 350) wheel_4_position = (650, 350) draw.ellipse((wheel_1_position[0]-wheel_radius, wheel_1_position[1]-wheel_radius, wheel_1_position[0]+wheel_radius, wheel_1_position[1]+wheel_radius), fill=wheel_color, outline=wheel_color) draw.ellipse((wheel_2_position[0]-wheel_radius, wheel_2_position[1]-wheel_radius, wheel_2_position[0]+wheel_radius, wheel_2_position[1]+wheel_radius), fill=wheel_color, outline=wheel_color) draw.ellipse((wheel_3_position[0]-wheel_radius, wheel_3_position[1]-wheel_radius, wheel_3_position[0]+wheel_radius, wheel_3_position[1]+wheel_radius), fill=wheel_color, outline=wheel_color) draw.ellipse((wheel_4_position[0]-wheel_radius, wheel_4_position[1]-wheel_radius, wheel_4_position[0]+wheel_radius, wheel_4_position[1]+wheel_radius), fill=wheel_color, outline=wheel_color) # Save the generated image ferrari_img.save('ferrari.png') # Display the image generated using OpenCV image = cv2.imread('ferrari.png') cv2.imshow('Ferrari', image) cv2.waitKey(0) cv2.destroyAllWindows() add the positions to draw the wheels 3 and 4, so that the image of Ferrari has four wheels. The generated image will be saved as "ferrari.png" and displayed using OpenCV. Hope this solves the problem! import cv2 from PIL import Image, ImageDraw # Load a blank image to create the basis of the Ferrari image ferrari_img = Image.new('RGB', (800, 400), (255, 255, 255)) draw = ImageDraw.Draw(ferrari_img) # Draw

Generation Data
Records
Prompts
Copy
import cv2 from PIL import Image
,
ImageDraw # Load a blank image to create the basis of the Ferrari image ferrari_img = Image
.
new('RGB'
,
(800
,
400)
,
(255
,
255
,
255)) draw = ImageDraw
.
Draw(ferrari_img) # Draw the body of Ferrari (red rectangle) body_color = (255
,
0
,
0) body_position = (100
,
100
,
700
,
300) draw
.
rectangle(body_position
,
fill=body_color
,
outline=body_color) # Draw Ferrari wheels (black circles) wheel_color = (0
,
0
,
0) wheel_radius = 50 wheel_1_position = (150
,
250) wheel_2_position = (650
,
250) wheel_3_position = (150
,
350) wheel_4_position = (650
,
350) draw
.
ellipse((wheel_1_position[0]-wheel_radius
,
wheel_1_position[1]-wheel_radius
,
wheel_1_position[0]+wheel_radius
,
wheel_1_position[1]+wheel_radius)
,
fill=wheel_color
,
outline=wheel_color) draw
.
ellipse((wheel_2_position[0]-wheel_radius
,
wheel_2_position[1]-wheel_radius
,
wheel_2_position[0]+wheel_radius
,
wheel_2_position[1]+wheel_radius)
,
fill=wheel_color
,
outline=wheel_color) draw
.
ellipse((wheel_3_position[0]-wheel_radius
,
wheel_3_position[1]-wheel_radius
,
wheel_3_position[0]+wheel_radius
,
wheel_3_position[1]+wheel_radius)
,
fill=wheel_color
,
outline=wheel_color) draw
.
ellipse((wheel_4_position[0]-wheel_radius
,
wheel_4_position[1]-wheel_radius
,
wheel_4_position[0]+wheel_radius
,
wheel_4_position[1]+wheel_radius)
,
fill=wheel_color
,
outline=wheel_color) # Save the generated image ferrari_img
.
save('ferrari
.
png') # Display the image generated using OpenCV image = cv2
.
imread('ferrari
.
png') cv2
.
imshow('Ferrari'
,
image) cv2
.
waitKey(0) cv2
.
destroyAllWindows()
add the positions to draw the wheels 3 and 4
,
so that the image of Ferrari has four wheels
.
The generated image will be saved as "ferrari
.
png" and displayed using OpenCV
.
Hope this solves the problem
!
import cv2 from PIL import Image
,
ImageDraw # Load a blank image to create the basis of the Ferrari image ferrari_img = Image
.
new('RGB'
,
(800
,
400)
,
(255
,
255
,
255)) draw = ImageDraw
.
Draw(ferrari_img) # Draw
INFO
Checkpoint & LoRA
Checkpoint
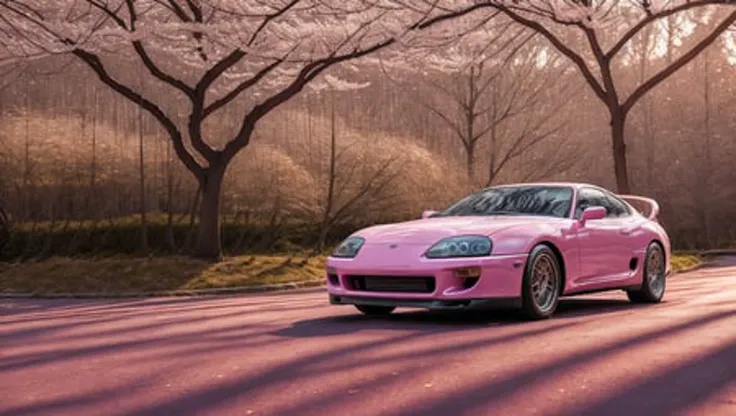
Dreamlike Diffusion 1.0
LORA
Mk4 Toyota Supra
#advertisement
#westernrealism
#model westernrealism
0 comment
0
0
0
SeaArt Swift AI Apps
AI Video Generation
Unleash your imagination and let AI create visual wonders for you
Face Swap Online Free
Create funny or realistic face swap videos & photos in a snap
AI Eraser
Easily remove unwanted objects, watermarks, or people from your photos.
AI Dance Video Generator
Play with this AI dance video generator, unleash your inner dancer instantly!
Disney Filter
Instantly transform your photos into Disney characters.

Wan 2.1 Image to Video
Animate photos with realistic motion and cinematic effects.
Explore More AI Apps